Introduction
In Today’s Software development world, automating the deployment process has become essential. In this article We'll walk you through the steps of creating a reliable CI/CD pipeline for your Node.js application in this article. Using GitHub Actions, and then we'll deploy your application to an AWS EC2 instance.
Step 1: Setup Node-js Project
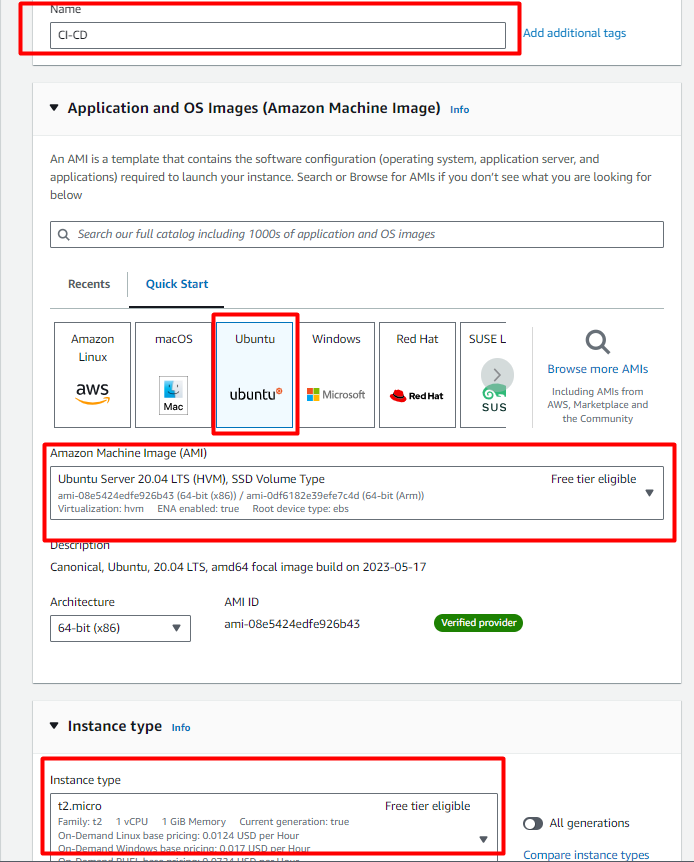
Launch an AWS EC2 instance using the Ubuntu Amazon Machine Image (AMI).
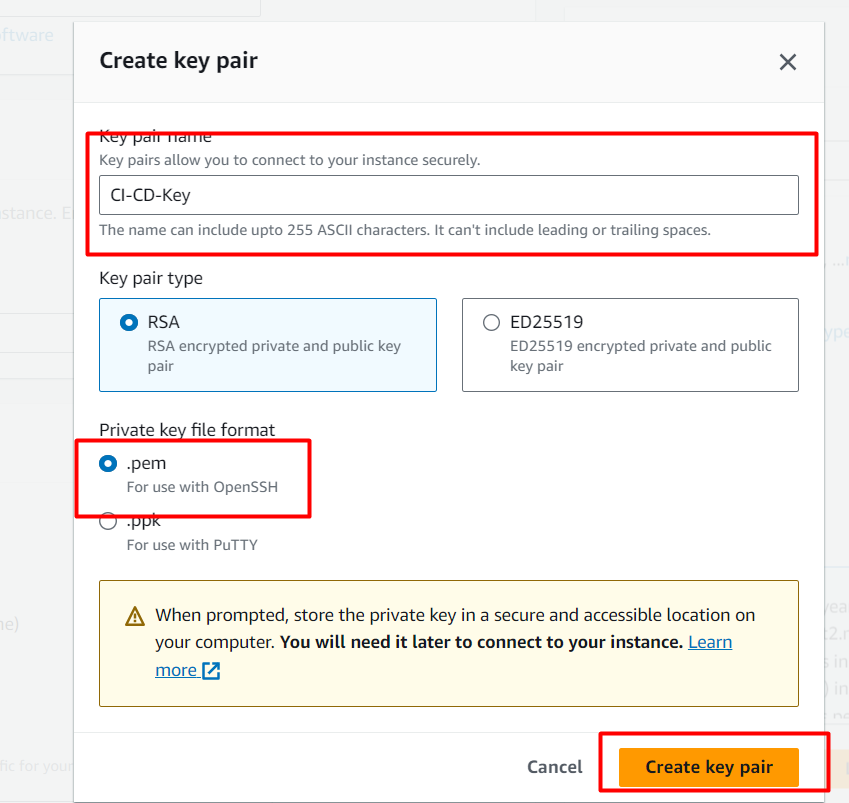
Create a PEM key pair for SSH access to your instance.
Configure inbound rules in the security group to allow SSH (port 22), HTTP (port 80), Custom TCP (port 3000) access.

Go to your GitHub repository and navigate to the "Actions" tab.
- Create a new workflow and select the Node.js template.
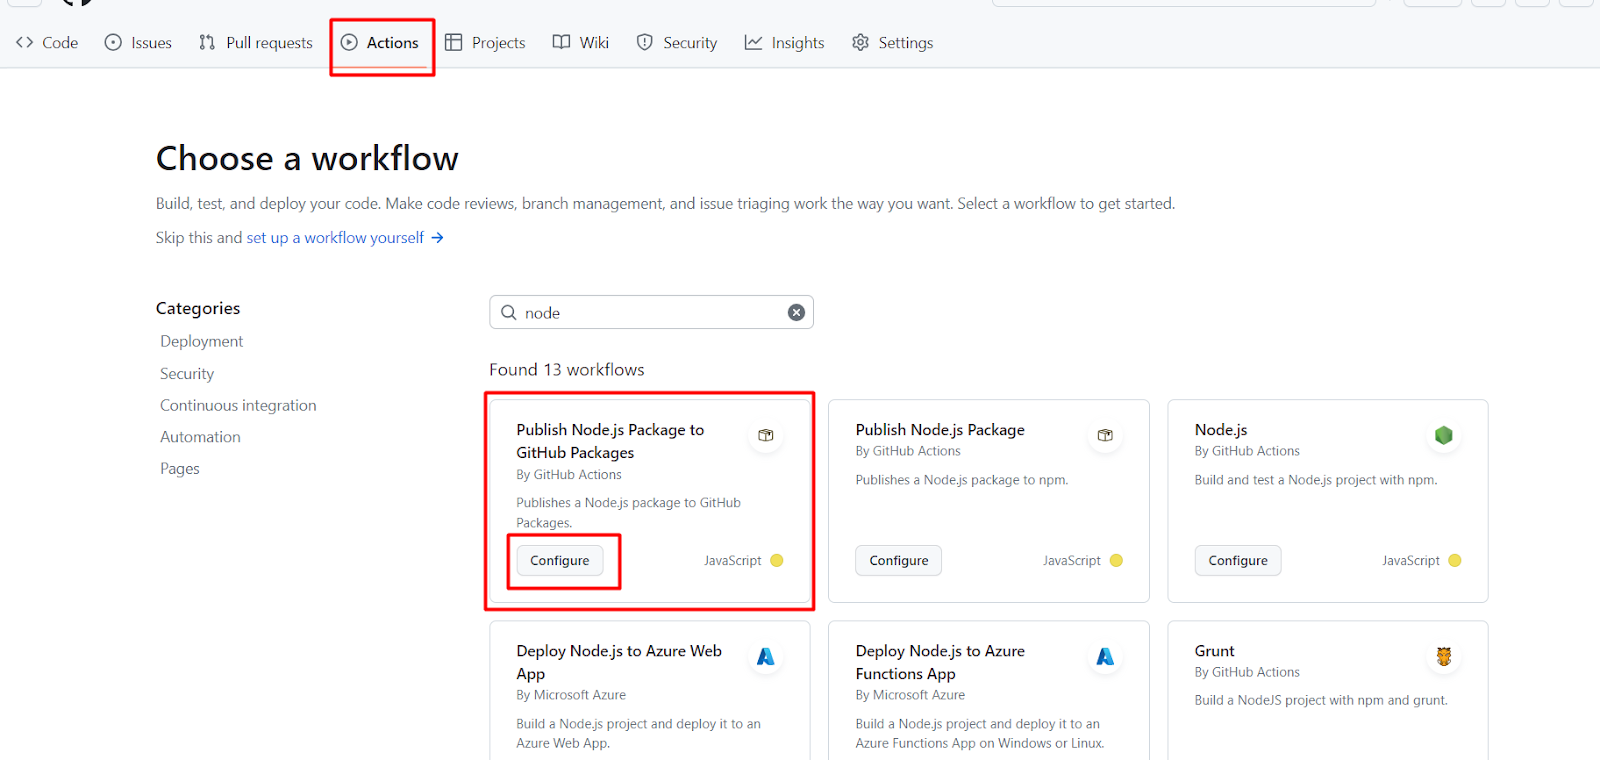
- Configure the workflow with the necessary GitHub Actions YAML file to automate the deployment process.
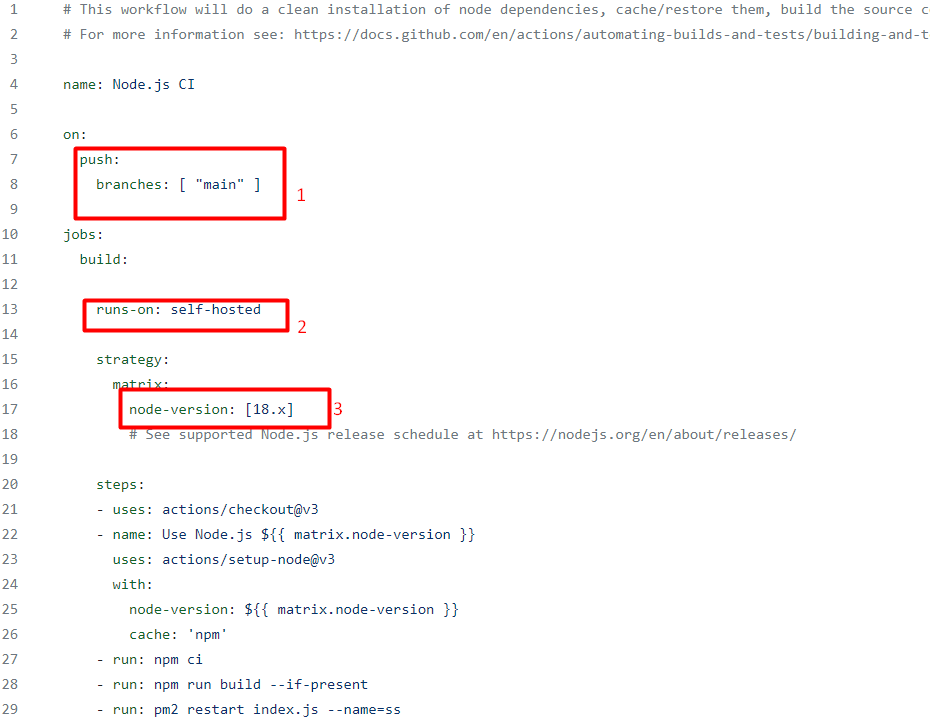
1. on: Section
This section defines when the workflow should be triggered. In this case, the workflow will be triggered whenever there is a push (commit) to the "main" branch of the repository. It means that when code changes are pushed to the "main" branch, this workflow will run
2. Runs-on: self-hosted
This line specifies the type of runner that the job will run on. In this case, it's using a self-hosted runner, which means the workflow will run on a machine or server set up by the repository owner rather than GitHub's own hosted runners.
3. strategy: node-version
This section defines a matrix strategy for the job. It allows you to run the same job multiple times with different configurations. In this case, it's using a matrix to specify the Node.js version to be used for the job. It's set to run with Node.js version 18.x.
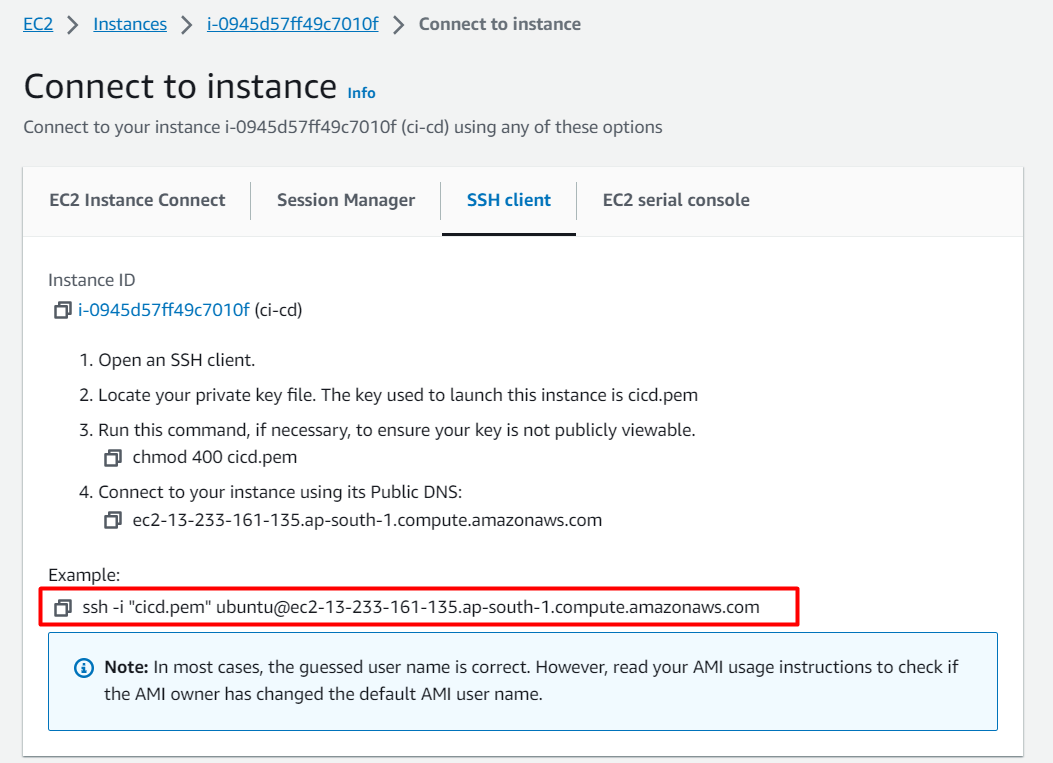
Step 4: Connecting to Your EC2 Instance
- Copy the PEM key you generated earlier and use it to connect to your EC2 instance.


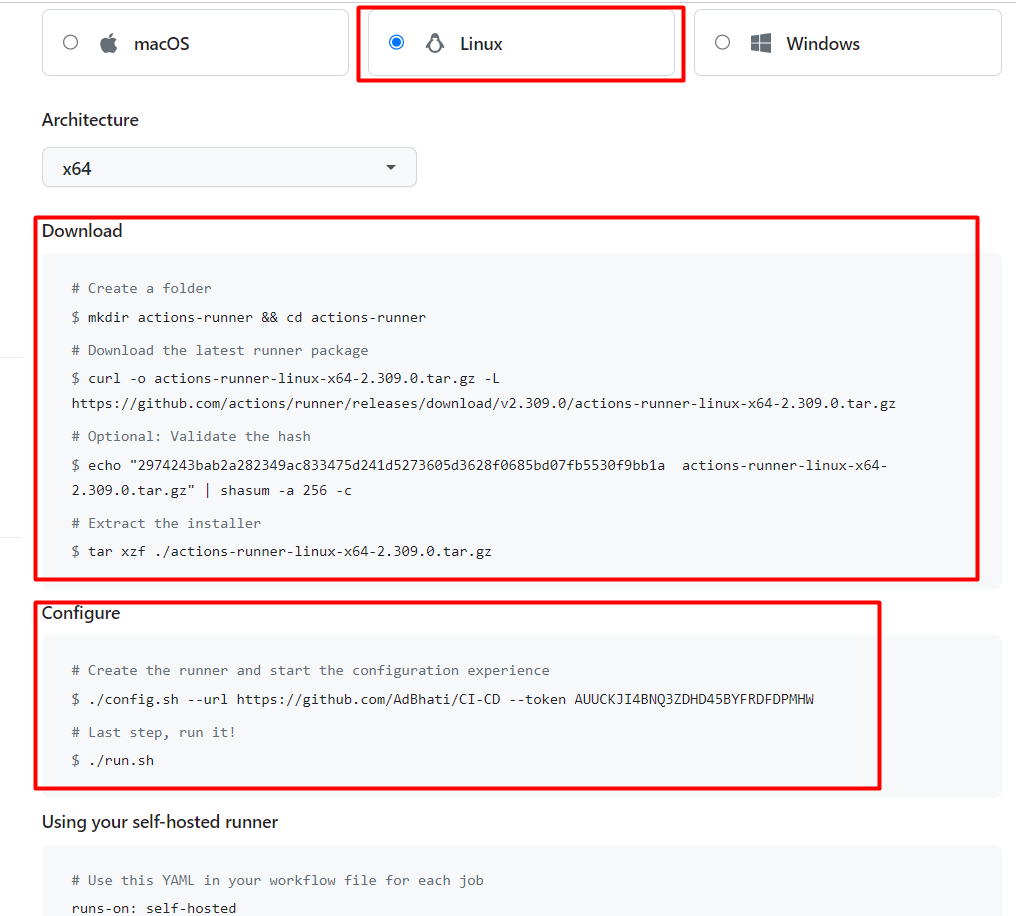
Note– mkdir actions-runner && cd actions-runner– change the folder name for avoiding confusion.
Step 6: Installing Node.js and Nginx
On your EC2 instance, run the following commands
$ sudo apt update
$ curl -fsSL https://deb.nodesource.com/setup_lts.x | sudo -E bash -
$ sudo apt-get install nodejs
$ sudo apt-get install nginx
Step 7: Running the Node.js Application
Install PM2 to manage the Node.js application.
npm i -g pm2
pm2
Start and manage the Node.js application using PM2.
sudo ./svc.sh install
sudo ./svc.sh start
After this, navigate to the _work folder on your EC2 instance.
This folder contains all the files, including your Node.js application.
cd _work
cd <your app_name>
pm2 start index.js
Step 8: Configuring Nginx for Reverse Proxy
Inside the Nginx folder, navigate to sites-available and open the default file.
Ensure that you include the following configuration block to set up a reverse proxy for your Node.js application
location /api/ {
proxy_pass http://localhost:3000; # Assuming your Node.js app is running on port 3000
proxy_set_header Host $host;
proxy_set_header X-Real-IP $remote_addr;
proxy_set_header X-Forwarded-For $proxy_add_x_forwarded_for;
}
And save it. And run the restart command – pm2 restart index.js --ss also paste this command in you yml file
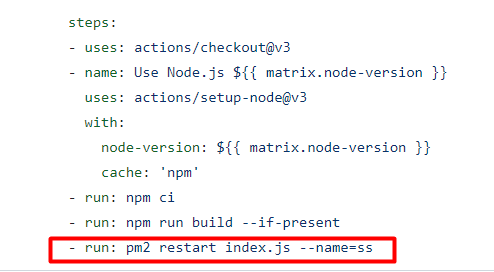
This command will ensure that whenever the server restarts the runner will run, after this Restart Nginx to apply the new configuration
sudo systemctl restart nginx
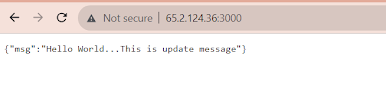
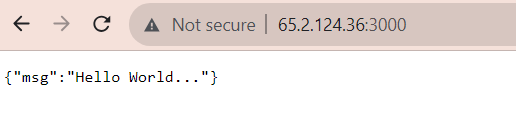
And in the final copy the public ip address and paste in the browser as shown in the image below…
Now whenever we do any changes in the code and push the code on your repository, the changes will reflect on the server automatically.